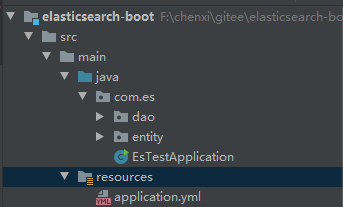
新建SpringBoot项目:

修改pom.xml文件,引入spring-boot-data-elasticsearch Jar 包:
<dependency>
   <groupId>org.springframework.boot</groupId>
   <artifactId>spring-boot-starter-data-elasticsearch</artifactId>
   <version>2.2.2.RELEASE</version>
</dependency>
修改application.yml文件,引入elasticsearch配置:
spring:
  data:
    elasticsearch:
      ##集群名称,elasticsearch.yml的cluster.name: chenxi配置
      ##详情见 http://chenxitag.elasticsearch.cluster.com
      cluster-name: chenxi
      ##集群地址逗号分隔,注意此地方用的端口为9300,Es集群TCP协议端口
      cluster-nodes: 192.168.0.1:9300,192.168.0.2:9300
新建测试Entity:
import lombok.Data;
import org.springframework.data.annotation.Id;
import org.springframework.data.elasticsearch.annotations.Document;


@Document(indexName = "chenxi", type = "user"/*shards = 1, replicas = 2 ##可指定分片数和副本数*/)
@Data
public class UserEntity {
    @Id
    private Integer id;
    private String name;
    private Integer age;
}
新建测试Dao:
import com.es.entity.UserEntity;
import org.springframework.data.repository.CrudRepository;

public interface UserDao extends CrudRepository<UserEntity, Integer> {
}
新建Test类测试:
import com.es.dao.UserDao;
import com.es.entity.UserEntity;
import com.google.gson.Gson;
import lombok.extern.slf4j.Slf4j;
import org.junit.jupiter.api.Test;
import org.springframework.beans.factory.annotation.Autowired;
import org.springframework.boot.test.context.SpringBootTest;
import org.springframework.data.elasticsearch.core.ElasticsearchTemplate;

@SpringBootTest
@Slf4j
class EsTestApplicationTests {

   @Test
   void contextLoads() {
   }

   @Autowired
   private UserDao userDao;

   @Autowired
   private ElasticsearchTemplate esTemplate;

   @Test
   void esSave(){

      UserEntity esEntity = new UserEntity();
      esEntity.setId(1);
      esEntity.setName("chenxi");
      esEntity.setAge(22);

      userDao.save(esEntity);
   }

   @Test
   void esFind(){
      log.info(new Gson().toJson(userDao.findById(1)));
      //info out "{"value":{"id":1,"name":"chenxi","age":22}}"
   }

   @Test
   void esTemplate(){
      log.info(String.valueOf(esTemplate.createIndex("template_index")));
      //info out "true"
   }
错误信息:NoNodeAvailableException[None of the configured nodes are available: [{#transport#-1}{P20ipqqfSNCzjirh0puSTQ}{192.168.0.1}{192.168.0.1:9300}, {#transport#-2}{I4slCrNuTbmVTOSZ3DG7hA}{192.168.0.2}{192.168.0.2:9300}]
请检查Es是否启动,以及Es环境elasticsearch.yml集群配置项:
# ———————————- Cluster ———————————–
#
# Use a descriptive name for your cluster:
# 节点集群名称,保证三台服务器节点集群名称相同
cluster.name: chenxi