SpringBoot整合Elasticsearch框架

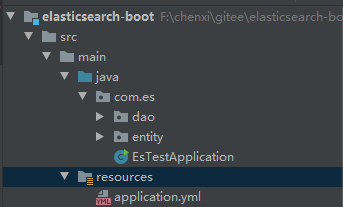
新建SpringBoot项目:

修改pom.xml文件,引入spring-boot-data-elasticsearch Jar 包:

<dependency>
   <groupId>org.springframework.boot</groupId>
   <artifactId>spring-boot-starter-data-elasticsearch</artifactId>
   <version>2.2.2.RELEASE</version>
</dependency>

修改application.yml文件,引入elasticsearch配置:

spring:
  data:
    elasticsearch:
      ##集群名称,elasticsearch.ymlcluster.name: chenxi配置
      ##详情见 http://chenxitag.elasticsearch.cluster.com
      cluster-name: chenxi
      ##集群地址逗号分隔,注意此地方用的端口为9300,Es集群TCP协议端口
      cluster-nodes: 192.168.0.1:9300,192.168.0.2:9300

新建测试Entity:

import lombok.Data;
import org.springframework.data.annotation.Id;
import org.springframework.data.elasticsearch.annotations.Document;


@Document(indexName = "chenxi", type = "user"/*shards = 1, replicas = 2 ##可指定分片数和副本数*/)
@Data
public class UserEntity {
    @Id
    private Integer id;
    private String name;
    private Integer age;
}

新建测试Dao:

import com.es.entity.UserEntity;
import org.springframework.data.repository.CrudRepository;

public interface UserDao extends CrudRepository<UserEntity, Integer> {
}

新建Test类测试:

import com.es.dao.UserDao;
import com.es.entity.UserEntity;
import com.google.gson.Gson;
import lombok.extern.slf4j.Slf4j;
import org.junit.jupiter.api.Test;
import org.springframework.beans.factory.annotation.Autowired;
import org.springframework.boot.test.context.SpringBootTest;
import org.springframework.data.elasticsearch.core.ElasticsearchTemplate;

@SpringBootTest
@Slf4j
class EsTestApplicationTests {

   @Test
   void contextLoads() {
   }

   @Autowired
   private UserDao userDao;

   @Autowired
   private ElasticsearchTemplate esTemplate;

   @Test
   void esSave(){

      UserEntity esEntity = new UserEntity();
      esEntity.setId(1);
      esEntity.setName("chenxi");
      esEntity.setAge(22);

      userDao.save(esEntity);
   }

   @Test
   void esFind(){
      log.info(new Gson().toJson(userDao.findById(1)));
      //info out "{"value":{"id":1,"name":"chenxi","age":22}}"
   }

   @Test
   void esTemplate(){
      log.info(String.valueOf(esTemplate.createIndex("template_index")));
      //info out "true"
   }

错误信息:NoNodeAvailableException[None of the configured nodes are available: [{#transport#-1}{P20ipqqfSNCzjirh0puSTQ}{192.168.0.1}{192.168.0.1:9300}, {#transport#-2}{I4slCrNuTbmVTOSZ3DG7hA}{192.168.0.2}{192.168.0.2:9300}]

请检查Es是否启动,以及Es环境elasticsearch.yml集群配置项:

# ———————————- Cluster ———————————–
#
# Use a descriptive name for your cluster:
# 节点集群名称,保证三台服务器节点集群名称相同
cluster.name: chenxi


Centos环境Kibana可视化平台搭建

Kibana环境搭建:

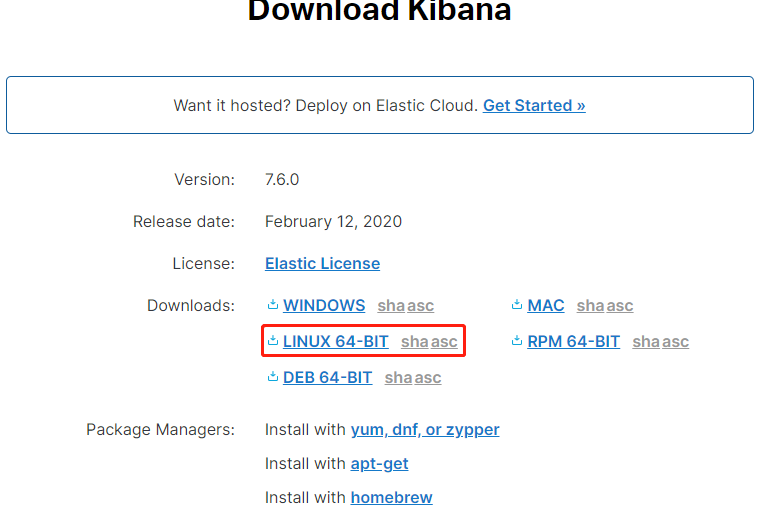
1.下载kibana包上传到服务器,下载地址:https://www.elastic.co/cn/downloads/kibana

2.解压下载的Tar包(过程比较久、大概30秒左右)

[root@chenxi software]# tar -zxvf kibana-7.6.0-linux-x86_64.tar.gz

3.重命名文件夹名称
[root@chenxi software]# mv kibana-7.6.0-linux-x86_64 kibana

4.进入kibana目录下
[root@chenxi software]# cd kibana

5.修改kibana.yml配置
[root@chenxi kibana]# vim config/kibana.yml

# Kibana is served by a back end server. This setting specifies the port to use.
# 取消注释,开放端口
server.port: 5601

# Specifies the address to which the Kibana server will bind. IP addresses and host names are both valid values.
# The default is ‘localhost’, which usually means remote machines will not be able to connect.
# To allow connections from remote users, set this parameter to a non-loopback address.
# 取消注释,配置服务器IP地址
server.host: “192.168.0.1”

# The URLs of the Elasticsearch instances to use for all your queries.
# 取消注释,配置ES环境IP地址以及端口
elasticsearch.url: “http://192.168.0.1:9200”

6.由于kibana安全性问题不能使用root启动,新建用户,并赋予文件夹权限或者启动命令后追加 –allow-root
[root@chenxi kibana]# groupadd kgroup # “kgroup” (组名)
[root@chenxi kibana]# useradd kuser # “kuser” (用户名)
[root@chenxi kibana]# chown -R kuser:kgroup /chenxi/software/kibana
#”/chenxi/software/kibana” 为安装目录

7.切换用户
[root@chenxi kibana]# su kuser

8.启动Kibana
[kuser@chenxi kibana]# bin/kibana

##注意防火墙开启5601端口和9200端口
##注意Kibana与Es版本号兼容问题
##注意低版本的Kibana不包含x-pack插件

控制台输出:
log [07:00:18.179] [info][listening] Server running at http://192.168.0.1:5601

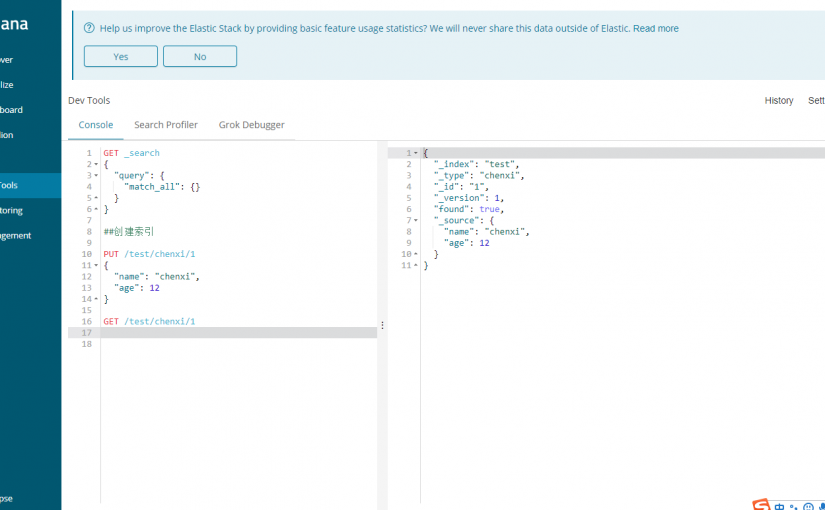
访问地址:http://IP:5601
用户名amin/123456

Elasticsearch集群环境搭建

Es集群搭建核心思想

   1.配置相同集群名称
   2.配置不同的节点ID

   3.修改X台服务器elasticsearch.yml配置

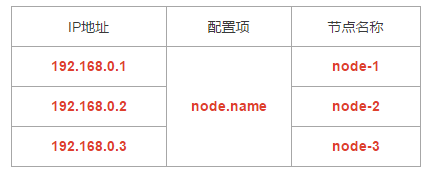
服务器环境->准备三台服务器集群

服务器集群配置:
## 修改elasticsearch.yml文件
[root@chenxi elasticsearch]# vim elasticsearch.yml

# ———————————- Cluster ———————————–
#
# Use a descriptive name for your cluster:
# 取消注释,修改节点集群名称,保证三台服务器节点集群名称相同
cluster.name: chenxi

# ———————————— Node ————————————
#
# Use a descriptive name for the node:
# 取消注释,每个节点名称不一样,其他两台为node-2, node-3
node.name: node-1

# ———————————- Network ———————————–
#
# Set the bind address to a specific IP (IPv4 or IPv6):
# 取消注释,服务器IP地址
network.host: 192.168.0.1

# ——————————— Discovery ———————————-
#
# Pass an initial list of hosts to perform discovery when new node is started:
# The default list of hosts is [“127.0.0.1”, “[::1]”]
# 取消注释,多个服务器集群IP
discovery.zen.ping.unicast.hosts: [“192.168.0.1”,”192.168.0.2″,”192.168.0.3″]
#
# Prevent the “split brain” by configuring the majority of nodes (total number of master-eligible nodes / 2 + 1):
# 取消注释,设置最小主节点为1
discovery.zen.minimum_master_nodes: 1

###关闭防火墙###

注意克隆data文件会导致数据不同步
启动错误信息:
        某台集群服务器报错 failed to send join request to master
解决办法:
        清除每台服务器data文件

集群验证地址:

如成功显示如下:
192.168.0.1 18 93 1 0.00 0.00 0.00 mdi * node-1
192.168.0.2 20 96 2 0.00 0.03 0.11 mdi – node-2
192.168.0.3 20 96 2 0.00 0.05 0.11 mdi – node-3

Elasticsearch启动常见问题

错误信息:
解决办法:
文件夹赋予用户权限

[root@chenxi elasticsearch]# chown -R eschenxi:esgroup /chenxi/software/elasticsearch #”/chenxi/software/elasticsearch” 为安装目录

错误信息:max virtual memory areas vm.max_map_count [65530] is too low, increase to at least [262144]
ERROR: [1] bootstrap checks failed
[1]: max virtual memory areas vm.max_map_count [65530] is too low, increase to at least [262144]
ERROR: Elasticsearch did not exit normally – check the logs at /chenxi/software/elasticsearch/logs/elasticsearch.log


解决办法
[root@chenxi elasticsearch]# vim /etc/sysctl.conf
在文件末尾追加:vm.max_map_count=655360
保存后执行

[root@chenxi elasticsearch]# sysctl -p

错误信息: [1]: max file descriptors [4096] for elasticsearch process is too low, increase to at least [65535]
ERROR: [5] bootstrap checks failed
[1]: max file descriptors [4096] for elasticsearch process is too low, increase to at least [65535]
[2]: max number of threads [1024] for user [es] is too low, increase to at least [4096]
[3]: max virtual memory areas vm.max_map_count [65530] is too low, increase to at least [262144]
[4]:  failed to install; check the logs and fix your configuration or disable system call filters at your own risk
[5]: the default discovery settings are unsuitable for production use; at least one of [discovery.seed_hosts, discovery.seed_providers, cluster.initial_master_nodes] must be configured


解决办法:

[root@chenxi elasticsearch]# vim /etc/security/limits.conf

## 65535修改为65536
* soft nofile 65536

* hard nofile 65536

## 文件末尾追加
* soft nproc 4096

* hard nproc 4096

修改文件后保存并“关闭会话,重新登陆服务器”

错误信息:system call filters failed to install; check the logs and fix your configuration or disable system call filters at your own risk
ERROR: [2] bootstrap checks failed
[1]: system call filters failed to install; check the logs and fix your configuration or disable system call filters at your own risk
[2]: the default discovery settings are unsuitable for production use; at least one of [discovery.seed_hosts, discovery.seed_providers, cluster.initial_master_nodes] must be configured


解决办法:
##在elasticsearch.yml修改并添加配置项

[root@chenxi elasticsearch]# vim config/elasticsearch.yml

# ———————————– Memory ———————————–
#
# Lock the memory on startup:
# 取消注释并设置值为false
bootstrap.memory_lock: false
# 追加配置项

bootstrap.system_call_filter: false

错误信息: the default discovery settings are unsuitable for production use; at least one of
ERROR: [1] bootstrap checks failed
[1]: the default discovery settings are unsuitable for production use; at least one of [discovery.seed_hosts, discovery.seed_providers, cluster.initial_master_nodes] must be configured

解决办法:
##在elasticsearch.yml添加配置项
[root@chenxi elasticsearch]# vim config/elasticsearch.yml

# ——————————— Discovery ———————————-
#
# Pass an initial list of hosts to perform discovery when this node is started:
# The default list of hosts is [“127.0.0.1”, “[::1]”]
#
#discovery.seed_hosts: [“host1”, “host2”]
#
# Bootstrap the cluster using an initial set of master-eligible nodes:
# 取消注释,并保留一个节点
cluster.initial_master_nodes: [“node-1”]

测试Es启动是否正常:

http://IP:9092

{
     “name” : “chenxi”,
     “cluster_name” : “elasticsearch”,
     “cluster_uuid” : “_na_”,
     “version” : {
               “number” : “7.6.0”,
                “build_flavor” : “default”,
                “build_type” : “tar”,
                “build_hash” : “7f634e9f44834fbc12724506cc1da681b0c3b1e3”,
                “build_date” : “2020-02-06T00:09:00.449973Z”,
                “build_snapshot” : false, “lucene_version” : “8.4.0”,                                          “minimum_wire_compatibility_version” : “6.8.0”,                                            “minimum_index_compatibility_version” : “6.0.0-beta1”
     },
     “tagline” : “You Know, for Search”

}


Centos安装Elasticsearch环境

由于Es是Java写的,安装ES的前提先安装好JDK

Es环境搭建:

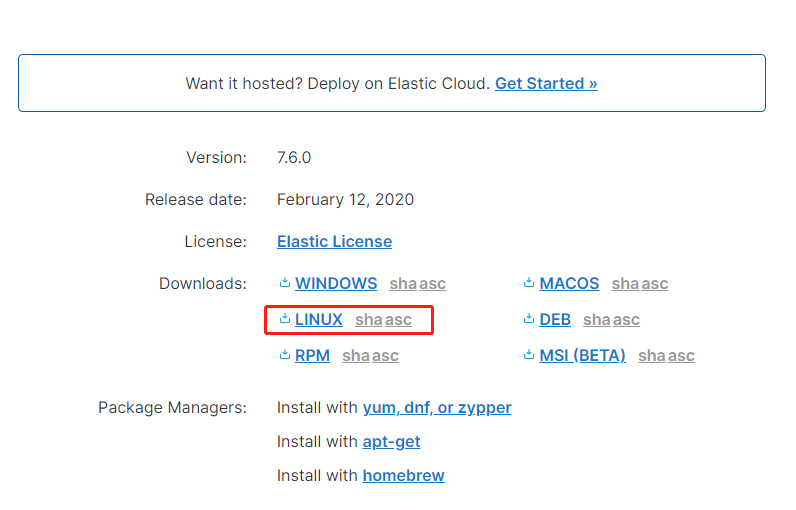
1.下载ES包上传到服务器,下载地址:
2.解压下载的Tar包

[root@chenxi software]# tar -zxvf elasticsearch-7.6.0-linux-x86_64.tar.gz

3.重命名文件夹名称

[root@chenxi software]# mv elasticsearch-7.6.0 elasticsearch

4.进入elasticsearch目录下

[root@chenxi software]# cd elasticsearch

5.根据自身条件调整JVM大小

[root@chenxi elasticsearch]# vim config/jvm.options

# Xms 表示总堆空间的初始大小 –默认1G
# Xmx 表示总堆空间的最大大小 –默认1G
-Xms1g

-Xmx1g

5.修改elasticsearch.yml配置

[root@chenxi elasticsearch]# vim config/elasticsearch.yml

# ———————————— Node ————————————
#
# Use a descriptive name for the node:
# 打开注释,节点名称可自己定义,如果是集群部署,则节点名称必须不相同
node.name: node-1

# Set the bind address to a specific IP (IPv4 or IPv6):
# 取消注释,服务器IP地址
network.host: 192.168.0.1
#
# Set a custom port for HTTP:
# 取消注释,Restful 对外接口提供的端口
http.port: 9200
#
# For more information, consult the network module documentation.
#
# Bootstrap the cluster using an initial set of master-eligible nodes:
# 取消注释,目前单台机器部署,只需保留node-1节点即可

cluster.initial_master_nodes: [“node-1”]

6.由于elasticsearch安全性问题不能使用root启动,新建用户,并赋予文件夹权限或者启动命令后追加 –allow-root
[root@chenxi elasticsearch]# groupadd esgroup # “eschenxi” (组名)
[root@chenxi elasticsearch]# useradd esuser # “eschenxi” (用户名)

[root@chenxi elasticsearch]# chown -R eschenxi:esgroup /chenxi/software/elasticsearch #”/chenxi/software/elasticsearch” 为安装目录

7.切换用户

[root@chenxi elasticsearch]# su esuser

8.启动ES

[esuser@chenxi elasticsearch]# bin/elasticsearch

#保持后台运行增加-d即可
[esuser@chenxi elasticsearch]# bin/elasticsearch -d
#查看es日志

[esuser@chenxi elasticsearch]# tail -f  logs/elasticsearch.log

##注意防火墙开启9200端口

测试Es启动是否正常:

http://IP:9092

{
     “name” : “chenxi”,
     “cluster_name” : “elasticsearch”,
     “cluster_uuid” : “_na_”,
     “version” : {
               “number” : “7.6.0”,
                “build_flavor” : “default”,
                “build_type” : “tar”,
                “build_hash” : “7f634e9f44834fbc12724506cc1da681b0c3b1e3”,
                “build_date” : “2020-02-06T00:09:00.449973Z”,
                “build_snapshot” : false, “lucene_version” : “8.4.0”,                                          “minimum_wire_compatibility_version” : “6.8.0”,                                            “minimum_index_compatibility_version” : “6.0.0-beta1”
     },
     “tagline” : “You Know, for Search”

}

Es启动常见问题http://chenxitag.es.problem.com

Elasticsearch框架基础概念

Elasticsearch(ES)是一个基于Lucene构建开源分布式搜索引擎并提供Restful接口。
Es是一个分布式文档数据库(JSON数据格式存储,类似MongoDB),JSON中的每个字段数据都可作为搜索条件,并且能够扩展至数以百计的服务器存储以及处理PB(PetaByte)级的数据。可在短时间内存储、搜索和分析大量的数据。
PB级级别: 拍字节(Petabytes),计算机存储容量单位,也常用PB来表示。1PB=1024TB==2^50字节。

Es优势:

横向可扩展性
          只需增加服务器,修改配置后启动Es就可并入集群
分片机制提供更好的分布性
          同一个索引分成多个分片(sharding),这点类似于HDFS的块机智,分别治理可提升处理效率
高可用
          提供复制(replica)机制,一个分片可以设置多个复制,使得某台服务器在宏碁的情况下,集群仍旧可以照常运行,并会把服务器宏碁丢失的数据信息复制恢复到其他可用节点上

Elasticsearch应用场景:

大型分布式日志分析系统ELK(elasticsearch(存储日志)+ logstash(收集日志)+ kibana(展示数据))。

Es存储结构:

Es是文件存储,面向文档型数据库,类似于MongoDB,用JSON作为文档序列化的格式

Es与数据库区别:

关系数据库 => 数据库(Database) => 表(Table) => 行(Row) => 列(columns) Elasticsearch=> 索引(index) => 类型(Type) => 文档 (Documents) => 字段(Fields)  

#注意:从ES 7.0.0开始,移除Type(类型)这个概念,Type 字段那里变为固定值 _doc Elasticsearch=> 索引(index) => _doc => 文档 (Documents) => 字段(Fields)

Es版本控制:

1.为什么要进行版本控制
    为了保证数据在多线程操作下的准确性
2.内部版本控制和外部版本控制
    内部版本控制: _version自增长,修改数据后,_version会自动+1
    外部版本控制:为了保持_version与外部版本控制的数值一致,使用version_type=external检查数据当前的version值是否小于请求中的version值

3.悲观锁和乐观锁

悲观锁:每次获取据时都会上锁,会造成线程阻塞
         底层实现:开启事务,启用锁机制
乐观锁:更新数据时候会判断在此期间是否有人更新过。
         底层实现:1.使用版本号 2.使用时间戳

9200和9300端口的区别:

9200端口: ES节点和外部通讯使用,暴露ES Restful接口端口号
9300端口: ES节点之间通讯使用,TCP协议、ES集群之间通讯端口号

倒排索引:

    把文档ID对应到关键词的映射转换为关键词到文档ID的映射,每个关键词都对应着一系列的文档,这些文档中都出现这个关键词。根据关键词查找文档ID迅速找出相关文档

ES如何解决高并发:

ES是一个分布式全文检索框架,隐藏了复杂的处理机制,内部使用分片机制、集群发现、分片负载均衡请求路由
Shards分片:代表索引分片,ES可以把一个完整的索引分成多个分片,好处是可以把一个大的索引拆分成多个,分布到不同节点上。构成分布式搜索。分片的数量只能在索引创建前指定,并且索引创建后不能更改。
Replicas副本代表索引副本,ES可以设置多个索引的副本。
副本的作用:
    1.提高系统的容错性,某个节点某个分片损坏或丢失时,可以从副本中恢复
    2.提高ES查询效率,ES会自动对搜索请求进行负载均衡

ES集群核心原理分析:

          1.每个索引会被分成多个分片shards进行存储,默认创建索引是分配5个分片进行存储,每个分片都会分布式在不同的节点上进行部署,该分片成为Primary shards主分片。
          注意:索引主分片数量定后,不能被修改
          路由算法: shard = hash(routing) % number_of_primary_shards
          如果number_of_primary_shards在查询的时候取余发生变化,无法获取到该数据
          2.每一个主分片为了实现高可用,都会有自己对应的副本,主分片对应的副本不能存放在同一台服务器上,主分片可以和其他副本存放在同一个Node节点上

如果此时Node-1节点是leader,Node-1节点down掉,此时会从(Node-2、Node-3)中选举一个节点作为一个Leader,不管某个节点挂掉,都能保证数据不丢失。除非所有节点全部down机

ES单机环境搭建:http://chenxitag.es.single.com